Enjoy a unique zero-alcohol experience and learn how to brew non alcoholic sour beer at home. All steps covered from ingredient selection, brewing to bottling.
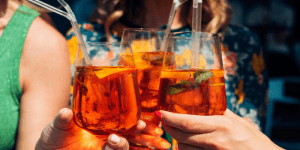
There’s plenty of debate about whether sour beers are the next big thing in craft brewing. Like many styles, they were once hugely popular—at one point, they were the only kind of beer around. However, as brewing techniques evolved and more options hit the market, their popularity faded.
Now, they are making a strong comeback, with more and more beer drinkers discovering just how much variety and complexity sour beers have to offer.
One of the reasons sours are gaining traction is their broad appeal. Hardcore beer lovers appreciate their depth and complexity, while people who don’t usually enjoy beer often find themselves drawn to the bright, fruity flavors. Thanks to their ability to win over such a wide range of drinkers, sour beers are popping up in craft breweries across the world.
So, are you ready to take a sip and see what the buzz is all about?
What is Non Alcoholic Sour Beer?
Non alcoholic sour beer is any beer with a tart, acidic, or slightly funky taste. What sets this style apart is the use of wild yeast and bacteria during fermentation, creating bright, complex flavors you won’t find in your average brew.
Unlike traditional beers, which rely on a single yeast strain, sours are fermented with multiple yeast strains and acid-producing bacteria. This gives them a sharper, more tangy character. Many brewers also add fruit, which naturally enhances the tartness with its organic acids.
Because sour beers rely on wild fermentation, their flavors can range from mildly tart and fruity to intensely sour and even funky. In contrast, more familiar beer styles use carefully controlled yeast strains in a sterile environment to ensure a consistent, predictable taste. With sours, you’re embracing the wild side of brewing—where every batch brings a unique twist.
Non Alcoholic Sour Beer Recipe
Now that you know the basics of sour beer, it’s time to put that knowledge to use! Here’s one of my favorite sour beer recipes, and I think you’ll love it.
Ingredients:
- 6 lbs Pilsner Malt
- 5 lbs Wheat Malt
- ½ lb Rice Hulls (optional—helps prevent a stuck mash)
- 3.75 AAU Hallertauer hops (e.g., 0.75 oz at 5% AA)
- 1 packet White Lab WLP618 NA All Day Yeast (or Fermentis US-05 Ale Yeast – see note below)*
- 1 pouch Wyeast 3278 Lambic Blend (for secondary fermentation)
- 4.5 ounces corn sugar
*Yeast: The key to making this a non alcoholic sour beer is using White Labs yeast for the first fermentation, which is specifically designed for non-alcoholic beer brewing. However, if you prefer not to use that, you can use regular Fermentis yeast and try one of the methods at the bottom of this article to de-alcoholize the beer instead.

Equipment:
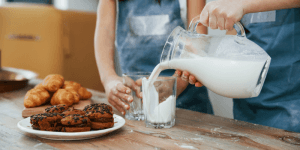
For this recipe, you’ll only need the basic tools for brewing your own beer. Here’s a quick list of what should be your brewing essentials:
- Grain bag
- Hops bag
- Fermenting bucket
- Mash paddle
- Digital thermometer
- Wort chiller
- Bottle filler
- Bottle caps and capper
- Beer bottles
Fermentation Process:
- Mash at 152°F for 30 minutes—full starch conversion isn’t crucial since the wild yeast and bacteria will break down the complex starches during secondary fermentation.
- After mashing out at 170°F, bring the wort to a boil. Once it starts boiling, toss in your aged hops.
- Let it boil for 90 minutes, then chill the wort and transfer it to your primary fermenter. Pitch the dry yeast, seal it up, and let it ferment for 14 days.
Carbonation and Bottling
- Pitch the Lambic blend directly into the primary fermenter for secondary fermentation.
- Transfer (rack) the beer to a clean fermenter before adding the Lambic blend if you prefer a more controlled secondary.
- Let the beer sit for six months, then take a gravity reading.
- Start tasting periodically using a pipette dedicated to sour beers—beginning around two weeks after brew day.
- If the buttery flavor is gone and the beer has a “bright” character, take a sample using a sanitized hydrometer, testing jar, and pipette. If the specific gravity is 1.010 or lower, it’s ready to be kegged or bottled. If it’s still above that, let it continue fermenting until it reaches the target. And remember—don’t pour tested beer back into the carboy!
- To carbonate your beer, start by bringing 1 cup of water to a boil. Turn off the heat and stir in 4.5 ounces of dextrose (corn sugar) until fully dissolved.
- Pour the mixture into the carboy using a sanitized funnel and let it sit for 10 minutes. Then, use an auto-siphon to transfer the beer into bottles, capping and sealing them as you go. This should yield around 48 12-ounce bottles.
- If you’re kegging instead, transfer the beer to a sanitized keg and carbonate according to standard keg carbonation instructions.
- Let the bottles sit for 2 to 3 weeks for natural carbonation, and they’ll be ready to enjoy!

Tips for Limiting the Alcohol Level
When making non-alcoholic sour beer, you need to carefully control fermentation to keep the alcohol content low. A few ways to do this include using special yeast strains that produce less alcohol, stopping fermentation early, or removing the alcohol after brewing.
There are two main ways to remove alcohol from beer: evaporation and reverse osmosis. Since alcohol has a lower boiling point than water, you can boil it off, leaving the remaining beer behind. To keep more of the original flavor, many brewers use vacuum distillation, which lowers the boiling point of alcohol so it evaporates at a gentler temperature.
Another approach is reverse osmosis, where beer is pushed through a semipermeable membrane. This process separates water and small molecules from larger ones, like alcohol and flavor compounds, allowing brewers to remove the alcohol without stripping away too much taste.
Conclusion
Patience is key when home brewing sour beer.
If you’re making your first non alcoholic sour beer, be prepared to wait. This style needs at least six months in secondary fermentation, and even after bottling, it will continue to evolve for years. The longer you let it age, the more complex and refined the flavors will become.