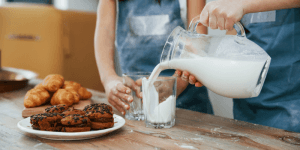
If you’d told me ten years ago that I’d be obsessing over a beer specifically because it didn’t have alcohol, I probably would’ve laughed you out of the grain room. But here we are.
Lately, I’ve noticed a massive shift in my own brewing habits—and the habits of the guys I ride with. We’re still craving that crisp, hoppy reward at the end of a 50km trek, but we’re over the “post-ride slump” that comes with a standard pint. This is where Electrolyte Non-Alcoholic (NA) Beer comes in. It’s the sweet spot where brewing science, water chemistry, and actual recovery meet.
In this guide, I’m going to walk you through how to pull this off without making your beer taste like a salt-lick. We’ll look at the “big three” electrolytes, the weird thermodynamics of high-temp mashing, and a 5-liter “Post-Run” Pale Ale recipe that’s become a staple in my fridge.

Quick Disclaimer: I’m a brewer, not a doctor. This is about recipe design and homebrewing education. Listen to your own body when it comes to hydration and medical needs.
The Cheat Sheet: “Post-Run” Isotonic Pale Ale
| Parameter | The Goal |
| Batch Size | 5 Liters (Perfect for a kitchen-counter setup) |
| Target ABV | Under 0.5% (The “Golden Standard” for NA) |
| Target Sodium | ~150mg / Liter |
| Mash Temp | 72°C (162°F) — This is non-negotiable! |
| Boil Length | 30 Minutes |
| The Yeast | LalBrew LoNa or SafBrew LA-01 |
| The Vibe | Like a lime-infused lightning bolt. |
1. What Exactly Is Electrolyte NA Beer?
At its heart, a recovery beer is a non-alcoholic brew that has been “tuned” for post-exercise. We’re looking for a light body, a snap of carbonation, and a mineral profile that actually helps you rehydrate.
The American College of Sports Medicine (ACSM) points out that rehydration isn’t just about chugging water; you have to replace the salts you left on the pavement. We aren’t trying to make “medicine” here. We’re trying to make a beer that does a better job for your body than a standard lager, which is a diuretic and usually works against your hydration goals.
2. The German “Olympic” Secret
If you think NA beer for athletes is a new fad, look at Germany. They’ve been giving non-alcoholic wheat beers to their Olympic athletes for years.
There’s a famous 2012 study by Johannes Scherr at the Technical University of Munich that followed marathon runners. Those who drank NA wheat beer for weeks around the race had significantly less inflammation and fewer “marathon colds” (upper respiratory infections). Why? Polyphenols. Hops and malt are packed with them.
The kicker is that alcohol cancels those benefits out. Dr. Matthew Barnes at Massey University has shown that hitting the booze after a workout can tank your muscle protein synthesis. So, by brewing NA, you keep the “good stuff” from the plants and ditch the metabolic tax of the ethanol.
3. The Isotonic Sweet Spot
You’ve seen the word “Isotonic” on sports drink labels, but in the brewing world, it’s all about osmolality.
An isotonic drink has the same concentration of particles as your blood. This is the “fast lane” for hydration—it moves from your gut to your bloodstream almost instantly. Standard beers are usually “hypertonic” (too dense), which can actually pull water away from your cells to help process the liquid.
By mashing at high temperatures to control sugar chains and keeping the alcohol near zero, we can trick the beer into that isotonic zone where it actually helps you bounce back.
4. The “Big Three” Minerals: Sodium, Potassium, Magnesium
When you’re designing the mineral profile, don’t just dump in table salt. You need to be surgical.
- Sodium: The MVP. It’s what you lose most in sweat. The University of Connecticut has done some great work showing that sodium keeps your “thirst drive” alive and helps your body actually hang onto the water you drink.
- Potassium: Your muscles’ best friend for fluid balance.
- Magnesium: Great for post-workout relaxation and energy metabolism.
I personally swear by Pink Himalayan Salt. It’s not just “fancy salt”—it has a broader trace mineral profile that tastes much more “organic” in a beer than the metallic bite of refined table salt.
5. Water Chemistry: The “Blank Canvas” Strategy
If your tap water tastes like a swimming pool or a penny, your recovery beer will too. In electrolyte brewing, you’re adding minerals, so you must start with a clean base.
I highly recommend starting with Reverse Osmosis (RO) water. The Water Quality Association notes that RO can strip 99% of dissolved solids. For a 5-liter batch, I never go above 0.8g of salt. Any more, and you’re drinking seawater, not ale.
6. Understanding the “Salty” Threshold
The biggest fear for homebrewers is making a “salty” beer. But here’s the cool part: carbonation and cold temperatures change how we perceive salt.
Researchers at the Monell Chemical Senses Center have found that in cold, fizzy drinks, sodium can actually make the beer taste sweeter and less bitter. It rounds out the edges. It’s only when you cross that ~200mg/liter mark that it starts to taste like a kitchen accident.
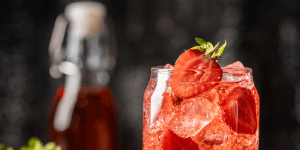
7. Selecting Hops for a “Sports Drink” Snap
You don’t want a heavy, piney West Coast IPA after a run. You want something that tastes like it came out of a cooler at a finish line.
- Motueka: My favorite for this style. It’s pure fresh lime zest.
- Citra: For that grapefruit/mango punch.
- Lemondrop: For a clean, zesty finish that isn’t cloying.
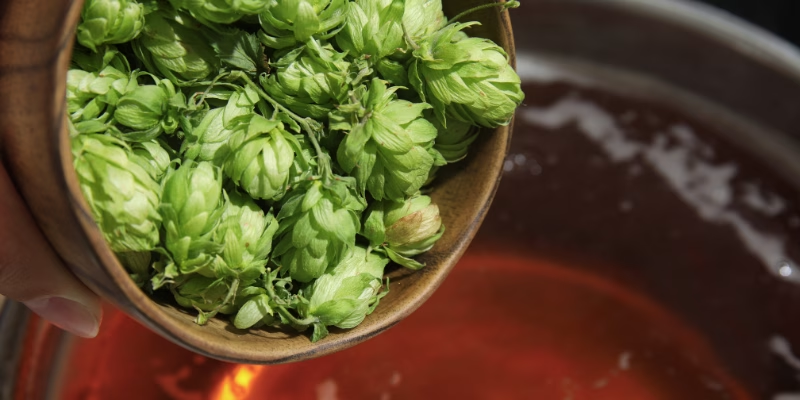
A study out of Oregon State University showed that whirlpooling at 80°C is the key. It lets you get those massive aromas without the tongue-scraping bitterness that can be tough on a post-race stomach.
8. Giving an NA Beer “Bones” (Body & Mouthfeel)
The hardest thing about NA beer is that it can feel like “hop water.” Alcohol provides weight and “legs” to a beer. To fix this, we use grains to build a fake skeletal structure.
I lean heavily on flaked oats. The Institute of Brewing & Distilling confirms that the beta-glucans in oats increase the viscosity of the liquid. It gives the beer a “roundness” that makes your brain think it’s drinking a full-strength brew.
9. The Magic of 72°C (162°F)
This is the most important part of the guide. If you mash at your normal 65°C, you’re going to make a 0.5% beer that tastes like thin, fermented juice.
At 72°C, you are essentially “killing” the beta-amylase enzyme. According to UC Davis, once that enzyme is gone, alpha-amylase takes over. It creates long-chain, unfermentable sugars called dextrins. The yeast can’t eat them, so they stay in the beer, giving it sweetness and body, but no extra alcohol.
10. Yeast: The “Maltose-Negative” Secret
For years, we had to boil our beer to get the alcohol out. It tasted like burnt bread. Now, we have yeasts like LalBrew LoNa or SafBrew LA-01.
These yeasts are “maltose-negative,” meaning they simply don’t have the “keys” to unlock and eat the main sugars in your wort. They ferment just enough to create carbonation and some fruity esters, then they quit. It’s the easiest way to stay under 0.5% ABV without fancy equipment.
11. The “Post-Run” 5-Liter Recipe
This is my go-to. It’s fast, cheap, and consistently better than the stuff I buy at the store.
The Grains
- 700g Pilsner Malt (Clean base)
- 150g Flaked Oats (The “Body”)
- 100g Carapils (Head retention)
- 50g Vienna Malt (A little bit of “bready” soul)
The Hops
- 5g Citra (15 mins)
- 10g Motueka (Whirlpool)
- 10g Motueka (Dry Hop)
The Minerals
- 0.8g Pink Himalayan Salt
- 1.5ml Lactic Acid (This is the secret to making it “pop”)
12. The Brew Day Walkthrough
- The Mash: Heat 4 liters to 76°C. In goes the grain. Stabilize at 72°C for 45 minutes. Don’t let it drift down!
- The Boil: Just 30 minutes. Keep it simple. Add Citra at 15 mins and your salt at 5 mins.
- The Whirlpool: Kill the flame. Cool to 80°C. Throw in the Motueka and walk away for 15 minutes.
- Fermentation: Chill to 20°C, pitch the yeast, and let it do its thing for a week. Dry hop on Day 4.
13. Don’t Get Sick: The Safety Talk
Brewing NA beer is actually riskier than brewing regular beer. Alcohol is a preservative; without it, you have “sugar water” that bacteria love.
The MBAA warns that pathogens like E. coli can live in liquids with a high pH.
- Fix 1: Use lactic acid to get your pH down to 4.2. Most bugs can’t survive that.
- Fix 2: If you’re bottling, consider pasteurizing. Put your capped bottles in a 60°C water bath for 20 minutes. It kills any lingering yeast or bacteria.
- Fix 3: Keep it cold. Always.
14. Carbonation: Crispness is King
A flat recovery beer is depressing. You want a high carbonation level—about 2.8 volumes. The ASBC notes that bubbles actually improve how we perceive “crispness.” It gives the beer that “snap” you need after a workout.
15. Troubleshooting: What Went Wrong?
- “It tastes like a pretzel”: You overshot the salt. Use RO water next time.
- “It’s too syrupy”: Your pH is too high. More lactic acid will brighten it up.
- “It tastes like cardboard”: Oxygen got in. Be more careful during your transfers!
16. FAQ: The Quick Hits
Final Thoughts
We’re in a new era of brewing. It’s no longer about getting a buzz; it’s about the craft, the flavor, and how the drink makes you feel the next day. As Mark Giordano of Georgetown University says about water—it’s about having the political and financial “wherewithal” to do things right. In the brewery, it’s about the technical wherewithal.
Precision mashing, smart mineral dosing, and the right yeast can turn a “compromise” drink into your favorite part of the workout.
So, what’s next? You want to talk about label designs for your “Post-Run” cans, or are you ready to dive into kegging vs. bottling for NA stability?
Cheers to the miles and the brew,
The AlcoFree Brew Team